No products in the cart.
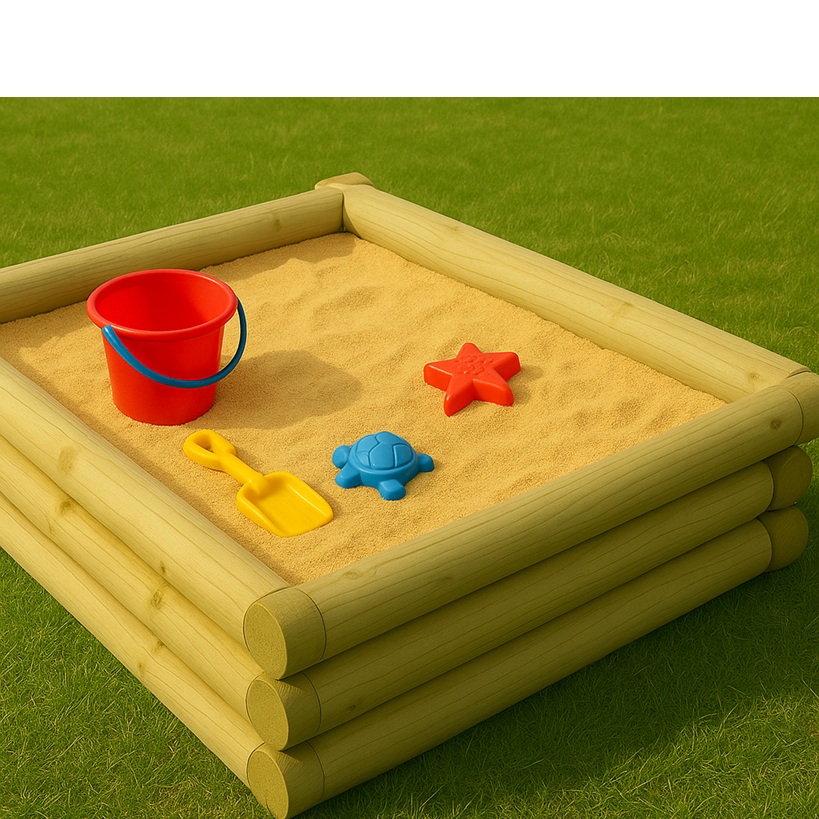
Building a sandpit with our Mini Railway Sleepers is a great DIY weekend project —they’re durable, rustic-looking, and provide a sturdy border. Their slightly curved edges make them safer for children. They come in 2 lengths 1.2m (4ft) and 2.4m (8ft) so you can make whichever size you would like without cutting. Here’s a clear step-by-step guide:
Choose where you want to put sandpit
The first thing you’ll need to do is choose the location.
- Partial Shade
- Why: Protects kids from harsh sun but allows some warmth and light.
- How: Place under a tree with dappled light, or near a wall/fence where a shade sail or umbrella can be added.
- Good Visibility
- Why: For easy supervision and safety.
- How: Choose a spot you can see from the house, patio, or main outdoor seating area.
- Flat, Well-Drained Ground
- Why: Prevents water pooling and keeps sand dry and clean.
- How: Avoid low-lying areas. Elevate slightly or improve drainage if needed.
- Away from Hazards
- Why: Safety for children.
- Avoid: Thorny plants, water features, BBQs, or ponds.
- Not Too Close to the House
- Why: To help prevent sand from being brought indoors.
- Tip: Use a mat at the door to minimize mess if near the house.
- Protection from Wind
- Why: Prevents sand from blowing away.
- How: Place near a fence, hedge, or garden structure that blocks wind.
- Room to Grow
- Why: Allows kids to play comfortably and expand the play area.
- Tip: Leave space for future add-ons like a playhouse or kid’s vegetable patch.
Materials and tools that you’ll need:
- Mini railway sleepers (4ft or 8ft lengths)
- Weed membrane or landscaping fabric
- Play sand (bulk buy) Play sand, (small bags)
- Galvanised steel brackets or sleeper screws (long, heavy-duty)
Tools:
- Drill with long wood bits
- Hammer/mallet
- Level
- Spade/shovel
- Tape measure
- Screwdriver
- Scissors
- Staple gun (optional)
Getting started:

You’ve already chosen your ideal location in the garden and have all your materials and tools at hand.
- Place the railway sleepers on the ground in a square or rectangular shape, with the railway sleepers touching at the 90-degree corners. (Like creating a big picture frame). It is best to lay the railway sleepers on a level and firm ground. It is easiest to simply lay them down directly on the earth.
- Attaching them to each other – This can be done in two ways either by using very long screws or else you can use a steel L-bracket on the inside in each corner as a fixing. Simply screw them together at the corners.
- For a second or third layer, you simply stack the railway sleepers on top of those already laid. You can use a wooden batten or metal strip to fasten the layers together.
- Laying a Woven Ground Cover and filling with sand- Lay a weed membrane fabric between the base soil and the sand you are going to add. You can attach the membrane to the railway sleepers with a staple gun if you like. Fill the sandpit with Play sand to the desired level. The sand in the play pit can take time to settle and may need topping up

Alternative Use when children outgrow using it
Clear out the sand and it makes an ideal raised bed for vegetables. Raised beds are an ideal way to grow vegetables in your garden and this is the perfect size to get your children started themselves. It’s easily accessible from all sides and far easier to maintain than planting into the ground. Have fun!